Many Microsoft Word features are also available in Google Docs, including the ability to incorporate tables, upload photos, and create drawings. As a result, Google Docs is among the most excellent substitutes for Microsoft Docs (free, of course). Google Docs supports a variety of Word-based tasks. However, a few features need to be added to Google Docs. For example, there’s no option to add a border in Google Docs. In addition, you cannot outline the page you are currently creating.
It can be problematic if you wish to write something with a border surrounding it. In that circumstance, what can be done? Unfortunately, Google Docs has no option to add a page border. However, there are workarounds you may use to Add a Border in Google Docs. Let’s examine a few of them in this article.
[lwptoc]
How to Add a Page Border In Google Docs
Best Ways to Create Borders in Google Docs: You can Add a Border in Google Docs pages using some of the methods listed here. Each of the strategies described below is quite straightforward. Follow the instructions below to insert a page border in Google Docs:
By Inserting a Single-Cell Table
This solution requires the addition of a single-cell table to create a page border. The necessary steps are as follows:
- First, open Google Docs and then tap on the Insert menu.
- Inside the insert menu, tap on Table and then click 1×1 table.
- You will now see a single-cell table on Docs.
- Now, readjust the height & width of the table so that it covers the entire page.
- After completing this, you will observe a table border. You may now enter text; the table will serve as a page border.
You can change the text color and background color to suit your preferences. If you dislike the table’s default style, you can modify it.
By Inserting a Drawing
It is another approach to Add a Border in Google Docs. This method requires inserting a graphic and using it to create a text box that serves as a page border. To do so, follow the instructions below:
- First, open Google Docs, tap on the Insert menu and then click on Drawing.
- Under the Drawing option, tap on New, select Shapes, and choose the rectangle shape.
- You’ll now get a drawing tool. Draw the rectangle & adjust it according to your requirement. Tap on Save and Close to save.
- A rectangle will be added to your document. You can alter the size by dragging the sides or the corners.
- If you wish to modify the document’s background border, pick the rectangle and click the Edit button.
- The drawing tool will reappear in the toolbar, where you may modify the fill color, border color, border line thickness, and border style.
- When done, click Save and Close, and the document will be saved.
ALSO SEE: How To Use Xbox Resolver
If you do not want to insert a shape in the document, you can add an image box, which will work the same way.
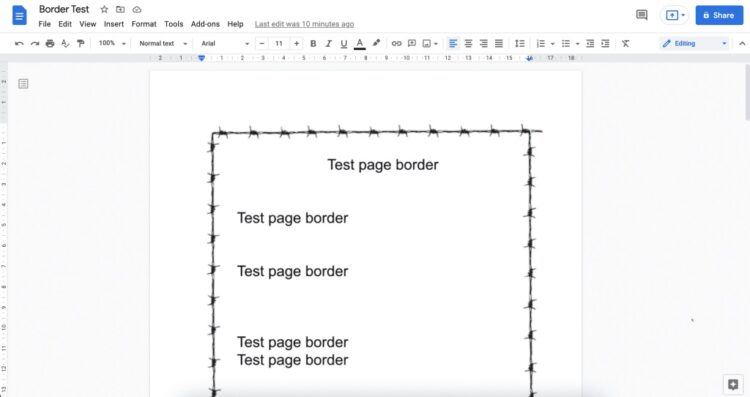
By Inserting an Image as Page Border
It is the best approach to make imaginative borders at this time. Inserting a border image into the document accomplishes this. To do so, follow the instructions below:
- First, open Google Docs, tap on the Insert menu, and then click Image.
- Under the Image option, tap on Search The Web.
- Type Borders in the search field and search the web for the borders.
- Choose an image that you like. After selecting, click on the Insert option.
- Now, a border will be put around the image. You can resize the image border by dragging the sides and edges with your mouse.
- Because the new frame is an image, you cannot type on it. Instead, you must place the image behind the text. You can accomplish this by following the instructions below:
- Choose the image and tap on the Behind Text icon at the bottom of the image.
- Now, you can type anywhere inside the image border very easily.
Conclusion
These were all the methods to Add a Border in Google Docs. As you are aware, Google Docs has no option to add a page border to your document automatically. Therefore you will need to use one of the other methods described in this post. You can add a border in Google Docs if you complete the instructions above.


