Suppose you notice that your Internet connection is slower than usual or that specific websites are unavailable when surfing. In that case, your Internet traffic is likely routed through a proxy server. As explained, a proxy server is a computer between you and your Internet service provider. It is commonly used in business settings to filter web traffic to and from staff workstations. In this post, I’ll demonstrate how to check your proxy settings to see if your machine uses a proxy server. Because an administrator normally controls the proxy server, you won’t be able to turn it off. However, there are situations when personal computers are unintentionally or maliciously configured to use a proxy server.
Check Proxy Settings In Windows
Most Windows browsers will use the proxy settings configured on the PC. Each browser includes a proxy settings page, which generally redirects to the Windows settings dialog. In Windows 10, you have two options for changing settings: the Settings app or the old Control Panel. I’ll explain both options because the Control Panel technique is essential for Windows 7, 8, and Vista.
Windows 10 Settings App
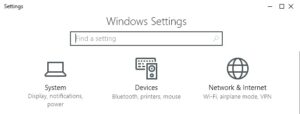
1- Click Start, then click the gear symbol (Settings) on the far left. In the Settings menu, select Network & Internet.
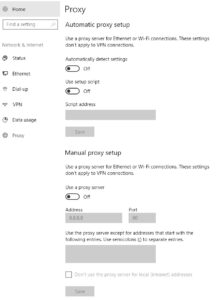
2- Click Proxy at the very bottom of the left-hand window.
You can find all the settings for configuring a proxy in Windows here. There are two options: automated or manual proxy configuration. Everything should be set to Off in 99.9% of circumstances. Your web traffic may be routed via a proxy if anything is enabled.
Control Panel
If you have an earlier version of Windows or prefer the traditional way, you may access the same settings via the Control Panel. It’s crucial to note that regardless of how you change the settings, Windows only has one set of proxy settings.
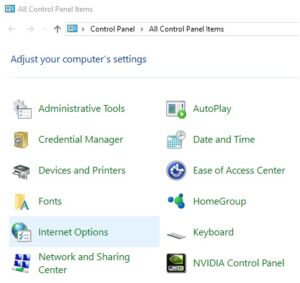
1- Open the Control Panel and navigate to Internet Options.
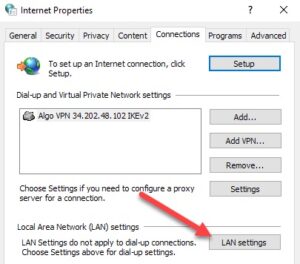
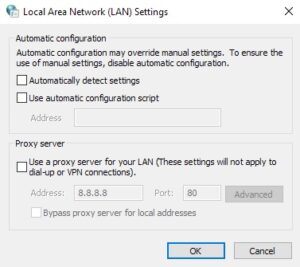
2- Click the Connections tab in the Internet Options window, then LAN settings at the bottom.
3- You’ll see the same settings as in the previous Settings app. Whatever you set here will appear there, and vice versa.
Check Proxy Settings In Mac OS X
If you use a Mac with OS X, the approach is identical. You must adjust the proxy settings in System Preferences since most browsers check them.
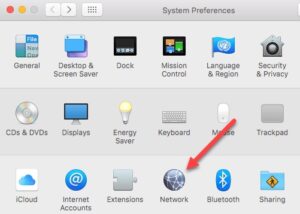
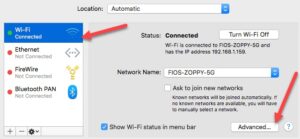
1- Navigate to System Preferences and choose Network. So, on the left, pick the linked or active network connection. Proxy settings can be configured for each kind of network connection.
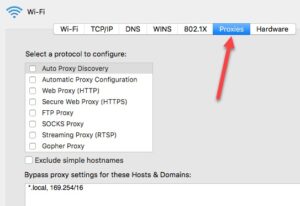
2- Pick the Advanced option at the bottom. When you choose the Proxies tab, you will be presented with a selection of protocols that you may set.
For example, if you select Web Proxy (HTTP), you may input the proxy server’s IP address, port number, username, and password.
Check Proxy Settings In Linux
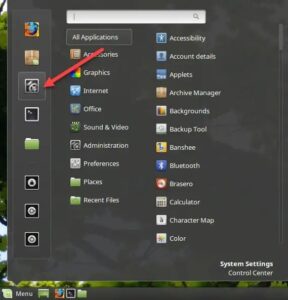
It is dependent on the Linux distribution you are using. However, it will likely be a version of KDE or GNOME. In Linux Mint Cinnamon, primarily based on GNOME, you would click the button followed by System Settings.
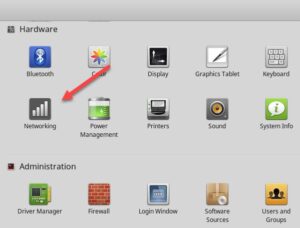
1- Next, go down to Hardware and then to Networking.
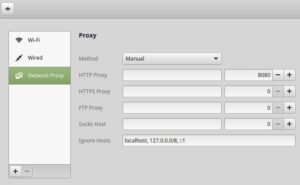
2- Finally, when you click Network Proxy, you may choose between Automatic and Manual.
Consider The Following:
The approach is the same for Ubuntu, which uses Unity and GNOME. It will be different if you use a different desktop environment. Check the proxy server settings if you have any inquiries regarding the post.


