Download Google Data: One of the drawbacks of using any platform for an extended period of time is that it becomes difficult to switch platforms if you wish. This is because you will either lose the data you have saved or will have to manually transmit what data you can to the new platform. For instance, when switching to a new email platform, you must either transfer your contacts and message history or make do without them.
Fortunately, if you ever want to move a Google platform, you can download all of your data. Furthermore, these downloads are available in formats suitable for uploading to third-party services. However, as a result of this design, the data may not be the easiest to read if you’re simply interested in seeing what data Google has on you.
To download a copy of your data, click on the nine-dot icon in the top-right corner of the majority of Google pages, then on the top-left option “Account.” Next, switch to the “Data & personalization” tab on the account page, then scroll down to the –> “Download, delete, or make a plan for your data” section and next click on the top option “Download your data.”
1- Select The Data You Want
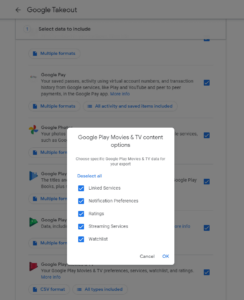
Well, You can then select which Google platforms you want to download data from on the “Google Takeout” screen. Numerous platforms allow you to select the format in which you want the data downloaded, such as JSON or CSV. Numerous options also allow you to specify subsets of data to download.
For instance, the “Google Play Movies & TV” settings give you the option of downloading any combination of your linked services data, notification preferences, streaming services, ratings, and watchlist in CSV or JSON format.
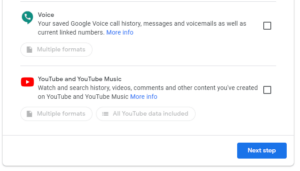
After you’ve checked all the data you wish to download using the checkboxes, scroll to the bottom of the page and next click “Next step.”
2- Select How You Want To Download Your Data
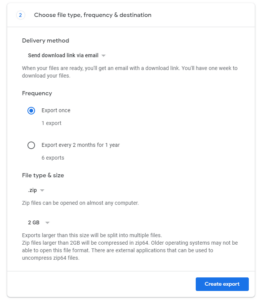
You can then specify how you want the file to be downloaded. You have the option of receiving an email with a link or having it uploaded to Google Drive, Dropbox, OneDrive, or Box. Additionally, you can schedule the export to occur once every two months for the next year.
Tip: Because your export may be quite large, exercise caution when uploading it to cloud services, as you may not have sufficient storage.
Following that, you must choose between “zip” and “tgz” compression methods; if you’re unsure which to use, opt for “zip” as it is more widely supported.
Finally, you must specify the maximum size of a single compressed file before it is split into multiple files. For example, if you choose a zip file that exceeds 2 GB in size, you may require a third-party decompression tool, as this is not supported by default on all operating systems.
Once your selections are complete, click “Create export.”
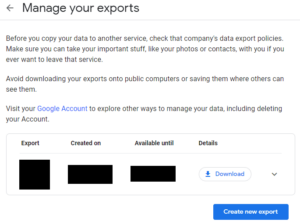
Depending on the amount of data included in your export, the process of creating it may take a long time. However, once it is complete, you will receive an email with a link to download your export. First, you’ll need to re-authenticate in order to confirm that you are the true owner of the account. After that, click “Download” on your exported export to download it.
Once the download is finished, you can either browse through the files manually or use the included “archive_browser.html” file to browse a convenient web interface for browsing through your downloaded files.


