Error 0x8000FFFF In Windows 10: Updates are supposed to be beneficial. They are supposed to add new features or, at the very least, fix any vexing bugs. Unfortunately, however, updates can occasionally result in errors on your Microsoft Windows 10 computer.
0x8000ffff is a common error that occurs when an app or the operating system is updated. You’re likely to come into it when attempting to access the Microsoft Store. In either case, there’s no need to panic if you encounter this error, as there are several possible solutions.
Delete The Microsoft Store Cache
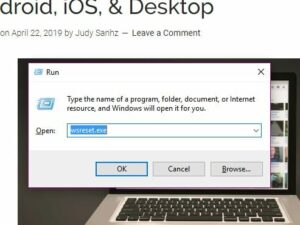
Let’s start with the quick fixes, one of which is clearing the Microsoft store cache. To clear the store’s Cache, press the Windows and R keys simultaneously to open the Run box. When the Run dialogue box appears, type wsreset.exe and click OK.
After about 10 seconds, you should see an empty Command Prompt; after that, the Microsoft Store should appear. Has nothing changed? Consider pressing the Windows and R keys at the same time and adding the following:
C:\Users\%USERNAME%\AppData\Local\Packages\Microsoft.WindowsStore_8wekyb3d8bbwe\LocalState
If a folder named Cache appears, right-click it and rename it Cache.old. Well, Right-click on an empty space and select new > folder, renaming it Cache. It is now necessary to launch the Windows Troubleshooter.
Solution:- How To Use The Windows Store Apps Troubleshooter
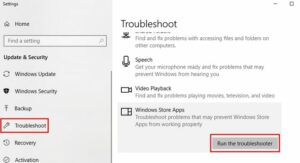
To open up the Troubleshooter, press the Windows, and I keys simultaneously. When the search bar appears, type Troubleshoot and click. Here, On the right pane, scroll down until you come to the Windows Store Apps option. When you click it, the option to Run the Troubleshooter will appear. Adhere to the instructions you will receive.
Try Installing Updates In After Performing A Clean Boot
When you start your computer with a Clean Boot, only the most critical programs and drivers are loaded. Windows users use this feature to isolate a problem. For example, a possible fix to the 0x8000FFF error is to install any updates that are available in this state.
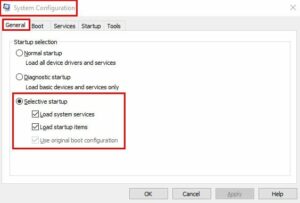
To start a Clean Boot on your computer, open System Configuration by typing msconfig in the start search box. Next, select the General tab from the System Configuration box that appears. Next, uncheck the Load Startup Items option and select the Use Original Boot Configuration and Load System Services check boxes.
Once complete, click on the Services tab and then on the box labeled Hide All Microsoft Services in the bottom left corner of the window. Finally, restart your computer by clicking the Disable button.
Well, If the issue persists after restarting your computer, return to the General Tab and uncheck the box for Load System Services, click Ok, and restart your computer again. To revert to a standard startup, uncheck the previously mentioned options, and everything will return to normal.
Update The Drivers
The error solution may be resolved by updating your drivers. To check if any updates are available, navigate to Settings > Update & Security > Check for Updates. The process will take a few seconds, and if there is an update awaiting your attention, you will see a notification.
Make Sure That The Time And Date Are Correct
While having the correct time and date may seem trivial, it can result in the 0x8000FFFF error. To correctly set the time and date, right-click on the time and date on the taskbar. Then, toggle on Set tune automatically when the window appears by clicking on adjust date/time.
Wrapping Up:
The 0x8000FFFF error is one of many that Windows users will come. At the very least, you now know what to do if you come to this specific error. Did I overlook a tip that you believe could assist others in resolving this error? Leave it in the comments section.


