Are you looking to capture images, video clips, or web pages that you frequent? Then, we’ll assist you in selecting the appropriate snipping tools for Mac.
You’re probably familiar with Windows‘ extremely useful snipping tool. It’s incredible. Wouldn’t it be wonderful to have a comparable tool on your Mac?
We have some encouraging news. We’ve previously discussed how to capture screenshots on a Mac using snipping tool shortcuts:
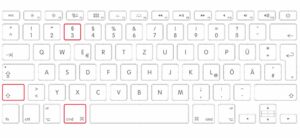
CMD + SHIFT + 3
It makes it possible to capture a full-screen screenshot
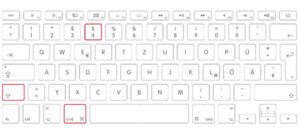
CMD + SHIFT + 4
Assists you in capturing a screenshot of a selected area
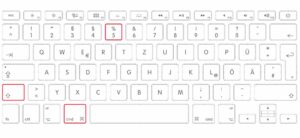
CMD + SHIFT + 5
Captures only the currently active window that you specify
Today, we’ll take a peek at some of the best snipping tools for Mac, which will make taking screenshots a breeze. They include the following:
8 Best Snipping Tools For Mac
Snipping tools enable you to capture a large portion of what you do on your computer screen each day. Several reasons why you might require a snipping tool include the following:
1- Making visual tutorials
2- Sharing your screen with friends
3- Sending screenshots for work
4- Keep a record of critical documents that you cannot download.
If you’re on the hunt for the ideal Mac snipping tool, take a look at our list below.
1. Snagit
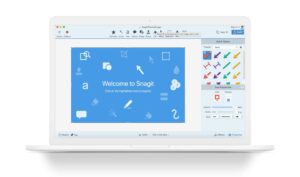
Snagit is, without a doubt, the gold standard of screen capture software. It is extremely popular among corporate customers due to its attractive interface and robust features. The capabilities for editing and screen recording are quite impressive. The app’s intuitive user interface is one of its highlights.
At the top of your screen, a small control panel appears. It enables you to capture screenshots, modify system settings, and create custom hotkeys. The editor features a variety of useful tools, including callouts, arrows, and blur. Additionally, you can create animated gifs and videos directly from the app. The process of capturing and editing images and videos is so seamless that even the most novice Mac user will be at ease.
Snagit enables you to capture your screen in a variety of different ways. You can capture a screenshot of the entire screen, a specific region, or an entire application. Additionally, you can import images from scanners and digital cameras. One of the most impressive features of this snipping tool for Mac is the ability to extract text from images and paste it into a text editor. To unlock all features, you must pay $50, which is a bit pricey in comparison to other tools.
2. SnapNDrag
SbapNDrag is a convenient MacBook snipping tool that enables you to capture a screenshot of the entire screen, a window, or a specific section of the screen without having to worry about key combinations.
Also, You can use the free version or upgrade to the pro version for $10. The pro version includes the ability to resize images, assign global hotkeys, and disable advertisements. If you work with screenshots, the paid version is the best option.
3. Monosnap
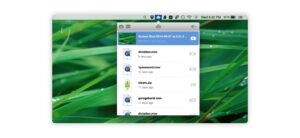
Monosnap is a cloud storage service, a secure content management system, and a snipping tool for Mac. It is also compatible with Windows and Chrome. It allows you to capture your entire screen or a portion of it in an instant and then use the built-in editing tools to mock-up and share your creation. Monosnap is the best snipping tool for Mac, earning 4.3 stars in the Apple App Store.
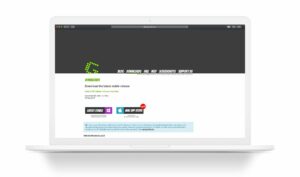
4. Greenshot
Greenshot is a widely used screen capture tool. Also, It includes a slew of useful features, such as the ability to copy an image to the clipboard or send it directly to a cloud-based program such as Confluence, Box.com, Dropbox, Flick, Imgur, JIRA, Picasa-Web, or your printer. Additionally, you can edit screenshots on the fly using the built-in editor. Greenshot enhances this already-awesome package by allowing you to blur portions of your screenshot in order to make it private. In addition, many of the default settings can be customized and personalized, and you can create your own hotkey combinations for enhanced functionality.
The program installs quickly and has an easy interface. After you’ve selected your area, the area turns green, and you hear a shutter sound to indicate that the shot was taken. Additionally, you can select an image format (BMP, GIF, JPEG, or PNG) and then edit it using the built-in tools.
Greenshot was originally a Windows-only application, but they recently released a Mac-compatible snip tool. Unfortunately, while users laud the Windows version, they are less enthused about the macOS counterpart. Thus, for the time being, Greenshot will not be dubbed the best free snipping tool for Mac, but you never know what the future holds.
5. Loom Screen Recorder
Loom Screen Recorder enables you to communicate effectively and quickly by taking screenshots or recording brief videos to send to colleagues, friends, or family. For instance, in the time it takes to type an email or create a mock-up of an idea, you can create a video or screenshot that communicates everything. Loom is available in both a free and a paid version. Loom is compatible with Windows, Chrome, Mac OS X, and iOS.
Well, If you’re looking for the best free video snipping tools for Mac, look no further than Loom! You can boost productivity, streamline your workflow, and increase customer satisfaction all at the same time by utilizing quick video recordings and screenshots.
6. CloudApp’s Mac Screenshot App and CloudApp for iOS
CloudApp’s screenshot App is another option in our Mac snipping tool lineup. CloudApp is a software powerhouse. They offer solutions for designers, developers, executives, marketers, sales and support personnel, and even production personnel. CloudApp is available online or as a download for Mac, Windows, Linux, and iOS devices.
CloudApp consistently receives high marks from reviewers and users. It’s a sophisticated product that enables you to capture and share your screen through the use of an enterprise-grade app. Additionally, take advantage of the integrated analytical tools, white-label capabilities, secure sharing, and controlled access features.
7. Skitch
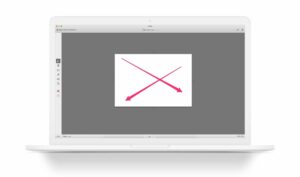
If you’re in the business of taking screenshots and annotating them for your team, Skitch is one of the best snipping tools for Mac available. Evernote designed and owned Skitch. If you are not already using Evernote, you will miss out on the push to integrate the two. Having said that, Skitch is a straightforward, elegant, and powerful snipping tool and markup editor for macOS, Windows, Android, and iOS. It comes with only seven tools, but why would you need more?
You can easily add text, shapes, arrows, highlighting, color, and drawings to your image, as well as add blurring, to obscure areas. It’s incredibly easy to use; you’ll be up and running in seconds. When you take a screenshot, you select an area, which illuminates, indicating what will and will not be included.
The only disadvantage is that the color selector is limited to eight colors. There are no special effects or filters included, and files cannot be saved locally. You must decide whether to email them, text them, import them into Evernote, or save them to your photos app. Apart from that, we give Skitch an enthusiastic thumbs up!
8. Recordit
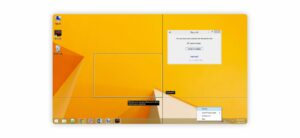
Recordit is a lightweight, plugin-based Mac snipping tool that you can install on your Mac or Windows machine to quickly record your entire screen or a portion of it. Users adore the model’s simplicity and portability, which enables you to multitask while screencasting.
Easily display software or tutorials directly on your desktop and then share them with the rest of your office. You can download the trial version for free or upgrade to the full version to unlock additional features.
Solution:- How To Snip On Mac
When switching from a Windows PC to a Mac, one of the first questions you may have is how to take a screenshot on the Mac. Although the Mac keyboard lacks a Print Screen button, there are still plenty of ways to quickly capture a screenshot.
CMD + SHIFT + 3
The CMD + SHIFT + 3 method is probably the quickest way to take a screenshot, especially when time is limited and you’re attempting to capture something temporary. Simultaneously press all three keys; you will hear a camera sound, and an instantaneous screenshot of your entire screen will be created and copied to your desktop. These keyboard shortcuts in macOS correspond to the Mac snipping tool, which is similar to the one found in Windows.
Following the camera sound, a thumbnail preview of your screenshot will appear in the lower-right corner of the screen. When you click this tiny image, the entire snipping tool for Mac opens, allowing you to edit, annotate, rotate, and otherwise make the image before saving it to your desktop.
CMD + SHIFT + 4
Another convenient precision for taking a more precise screenshot on the Mac is to use CMD + SHIFT + 4. This method enables you to select an area of the screen around which you want to capture a portion. You can specify precisely what you want to be copied to the desktop. To employ this method, simply follow the steps below:
1- Simultaneously press the CMD + SHIFT + 4 keys. Next, A small bullseye will appear on the screen.
2- Now, click the top-left corner of the area you wish to select with your mouse or trackpad.
3- Continue holding and dragging until a rectangle is drawn around the entire area you want to select.
4- When you release the mouse, a camera sound will play, and the screenshot will be copied to your desktop.
Once again, a small preview of the screenshot will appear in the lower right-hand corner of your screen. You only have a few seconds to click that image to activate the snipping tool and make edits. Close the box if you make a mistake, and the original will be copied to your desktop.
Well, You may have to practice this method several times before mastering it, but the precision it provides is well worth the effort.
If you have a MacBook Pro with Touch Bar, you can use the Touch Bar to select Selected Portion, Window, or Entire Screen and specify where the copy should be saved.
CMD + SHIFT + 5
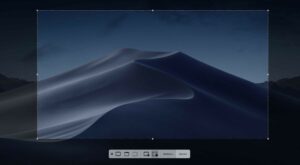
CMD + SHIFT + 5 is a new feature in macOS Mojave. When you select this option, an overlay window appears, allowing you to select full-screen, a window, or a selection screenshot.
Additionally, this innovative new feature enables you to record a video of your entire screen or just a portion of it. Two additional options include the ability to select the location of the file and a handy delay of 5 or 10 seconds for quickly aligning objects before the screenshot takes a picture.
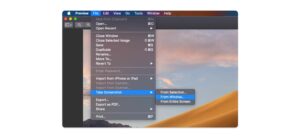
One More Hidden Trick – Preview Screenshot
Thus, you now understand how to use Mac’s snipping tool. However, there is one additional hidden trick we would like to share. A screenshot option is tucked away in the Preview menu. Simply select File, Take a Screenshot, and then choose “From Selection,” “From Window,” or “From Entire Screen” while a PDF or image file is open in Preview.
These menu items will follow the place of the keyboard shortcuts, but you will retain the same options and instructions as before.
That is all! You have now mastered the art of taking screenshots on a Mac.
Final Words:
Taking screenshots on your Mac does not have to be difficult. You are also not required to memorize shortcuts. Instead, our carefully curated Snipping Tools for Mac will assist you in completing the task at hand without breaking a sweat.


